 Get Kenney Game Assets All-in-1 to download everything at once, plus free updates!
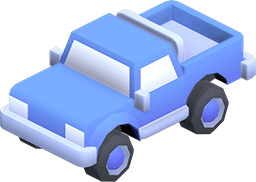
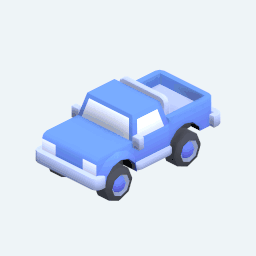
Most of the available software for rendering 3D models is either expensive or hard to learn. Luckily there's Godot, perfectly capable of rendering sprites.
Preparation
Create a new 3D scene and place the object you wish to render in the center of the scene. You can grab thousands of 3D models (free to use, public domain) from our asset archive.
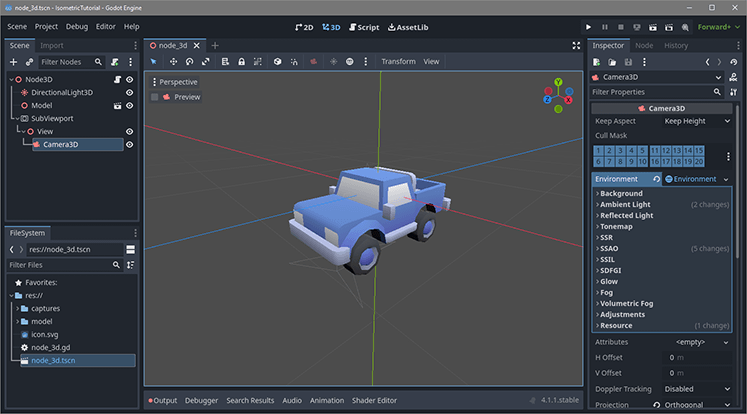
Also add a Viewport node, and a Camera3D node. You might also wish to add a WorldEnvironment to adjust shadows, colors and more. Make sure the Camera3D is a child of the Viewport node. For the Viewport node adjust the properties so 'Update mode' (found under 'Render Target') is set to 'Always' and 'Transparent BG' is set to 'On'.
Adjust the camera position and rotation accordingly, set the projection to orthographic. For rotation I'd recommend 30, 45, 0 according to this Wikipedia entry.
Rendering a sprite
Add a new script with the following code;
extends Node3D

func _ready():
    await RenderingServer.frame_post_draw # Wait for rendering
    var img = $Viewport.get_texture().get_image() # Get rendered image
    img.save_png("capture.png") # Save to disk
You might have to adjust the '$Viewport' variable to the name of your Viewport node, you can also adjust the name of the saved image. By default it gets saved into your project. Run your project and a screenshot will be made automatically.
Adjust the size of the Viewport node to adjust the size of the rendered sprites.
Rendering multiple sprites
To render an object from multiple sides adjust the code accordingly;
extends Node3D

func _ready():

    var angles = 10 # Amount of angles to render

    for n in angles:
        await RenderingServer.frame_post_draw # Wait for rendering
        capture(n) # Capture
        $Model.rotate_y(deg_to_rad(360 / angles)) # Rotate object

func capture(index):
    var img = $Viewport.get_texture().get_image() # Get rendered image
    img.save_png("capture_" + str(index) + ".png") # Save to disk
For this you might again want to adjust the '$Viewport' variable to your Viewport node and the '$Model' variable pointing towards the object which you wish to rotate. You can set the amount of angles to render in the 'angles' variable!
Extending
You can expand/improve this process by making the script go through a bunch of objects in batch, or rendering other views of the same model alongside isometric renders.