 Get Kenney Game Assets All-in-1 to download everything at once, plus free updates!
Using this guide you'll learn how to UV map a model created in Asset Forge using Blender.
Requirements:
• Asset Forge (2.0+)
• Blender (2.8+)
Exporting from Asset Forge
In order to open the model you've created in Asset Forge you'll have to export as DAE (Collada). You can also select the Blender template in the exporting panel to make sure you've got the right settings selected. It is recommended to merge blocks, however this is not a requirement.
Importing into Blender
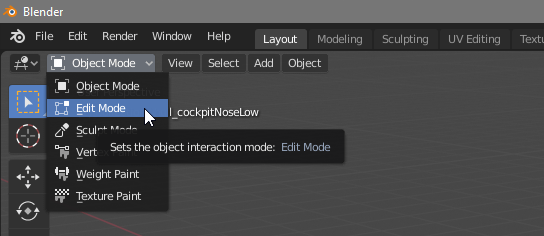
In Blender select File › Import › Collada (.dae) and select the file you exported from Asset Forge. Select the whole model (press A) and switch from Object Mode to Edit Mode in the top left.
UV mapping
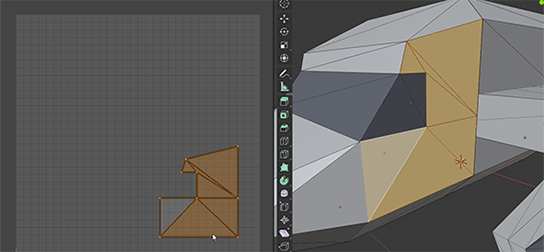
Select the UV Editing tab at the top. In order to select faces you'll need to enable the face select mode, if you select faces in the right pane you'll notice they'll also appear on the left UV map. By holding SHIFT you can select multiple faces, select the faces you'd like to map in the right pane. Then in the left pane you can move around those faces on the map, pick an empty spot (you can use G to move, S to scale).
Tip: You can also let Blender do the work, however it'll be harder to see which face is at what position in the map. Select all faces
A, then select all faces in the UV mapAand selectUV›Pack Islands.
UV Exporting
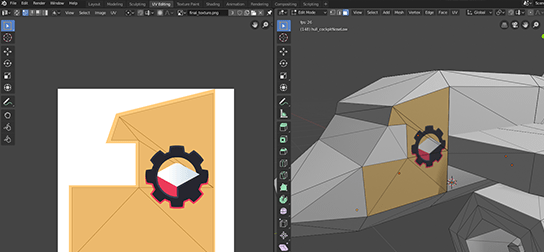
Select UV › Export UV Layout to save an image of your UV map including the lines for each face, this will be the guide for texturing. Open the saved UV Layout in the image editor you'd like to draw the textures in (like Glimpse or Inkscape). After you're satisfied with your texture save the image.
UV Importing
Select Image › Open and select the image you've drawn. In order to see the map applied to your model select the materials tab (the textured sphere) on the right and select each material you want texture mapped. For each material click the small open circle next to Base Color, the select Image Texture and select the UV texture.
Tip: If you still can't see the texture make sure to set the viewport render mode to
Render previewin the upper right corner.
Exporting the model
If you're satisfied with your UV map and texture you can select File › Export to save your model.